Edit Smarter, Not Harder: Unlock Fine Adjustments with Lightroom’s Quick Develop Panel
Relative Adjustments in Lightroom - A Detailed Guide
When editing photos in Adobe Lightroom Classic, most users spend their time in the Develop Module. This is where you have access to an array of sliders like Exposure, Contrast, Highlights, Shadows, and more. These sliders allow for highly precise adjustments, down to increments as small as 0.01 for Exposure and 1 for all others. It’s an excellent tool for refining your images with great accuracy.
If you're working with a batch of similar photos, Lightroom provides a convenient way to streamline your workflow. By selecting multiple images, you automatically enable the Auto Sync feature. With Auto Sync, any changes you make to one photo are instantly applied to all the selected images. This is incredibly useful when editing sets of photos captured in similar lighting conditions or with similar compositions.
The Challenge: Relative Adjustments Across Varied Photos
But what happens when you’re dealing with photos that are quite different from one another, or perhaps already edited to some extent, and you still need to make adjustments across multiple images simultaneously, e.g. make all a 3rd stop brighter? Direct synchronization will not work well in these cases, as it applies identical changes rather than adjusting each image relative to its current state.
This is where the Quick Develop panel in the Library Module comes into play. Despite its somewhat misleading name, Quick Develop is not just about speed; its real strength lies in relative editing. It is also a perfect place to edit your photos by judging a more or less small thumbnail to get a good starting point for later adjustments.
What Is Relative Editing?
Relative editing means that adjustments are applied as increments or decrements relative to the photo’s existing settings. For instance, if one photo has an Exposure value of +1.0 and another has -0.5, increasing Exposure in Quick Develop by 0.33 will raise the first photo to +1.33 and the second to -0.17. This makes Quick Develop a powerful tool when working with a diverse set of images.
E.g. when I have a sequence of photos I can quickly compare them in the Library Module and adapt settings to all or a single photo without going in the (somewhat slow) Development Module.
Navigating the Quick Develop Panel
In the Quick Develop panel, you can adjust several parameters, including:
Temperature
Tint
Exposure
Contrast
Highlights
Shadows
Whites
Blacks
Clarity
Vibrance
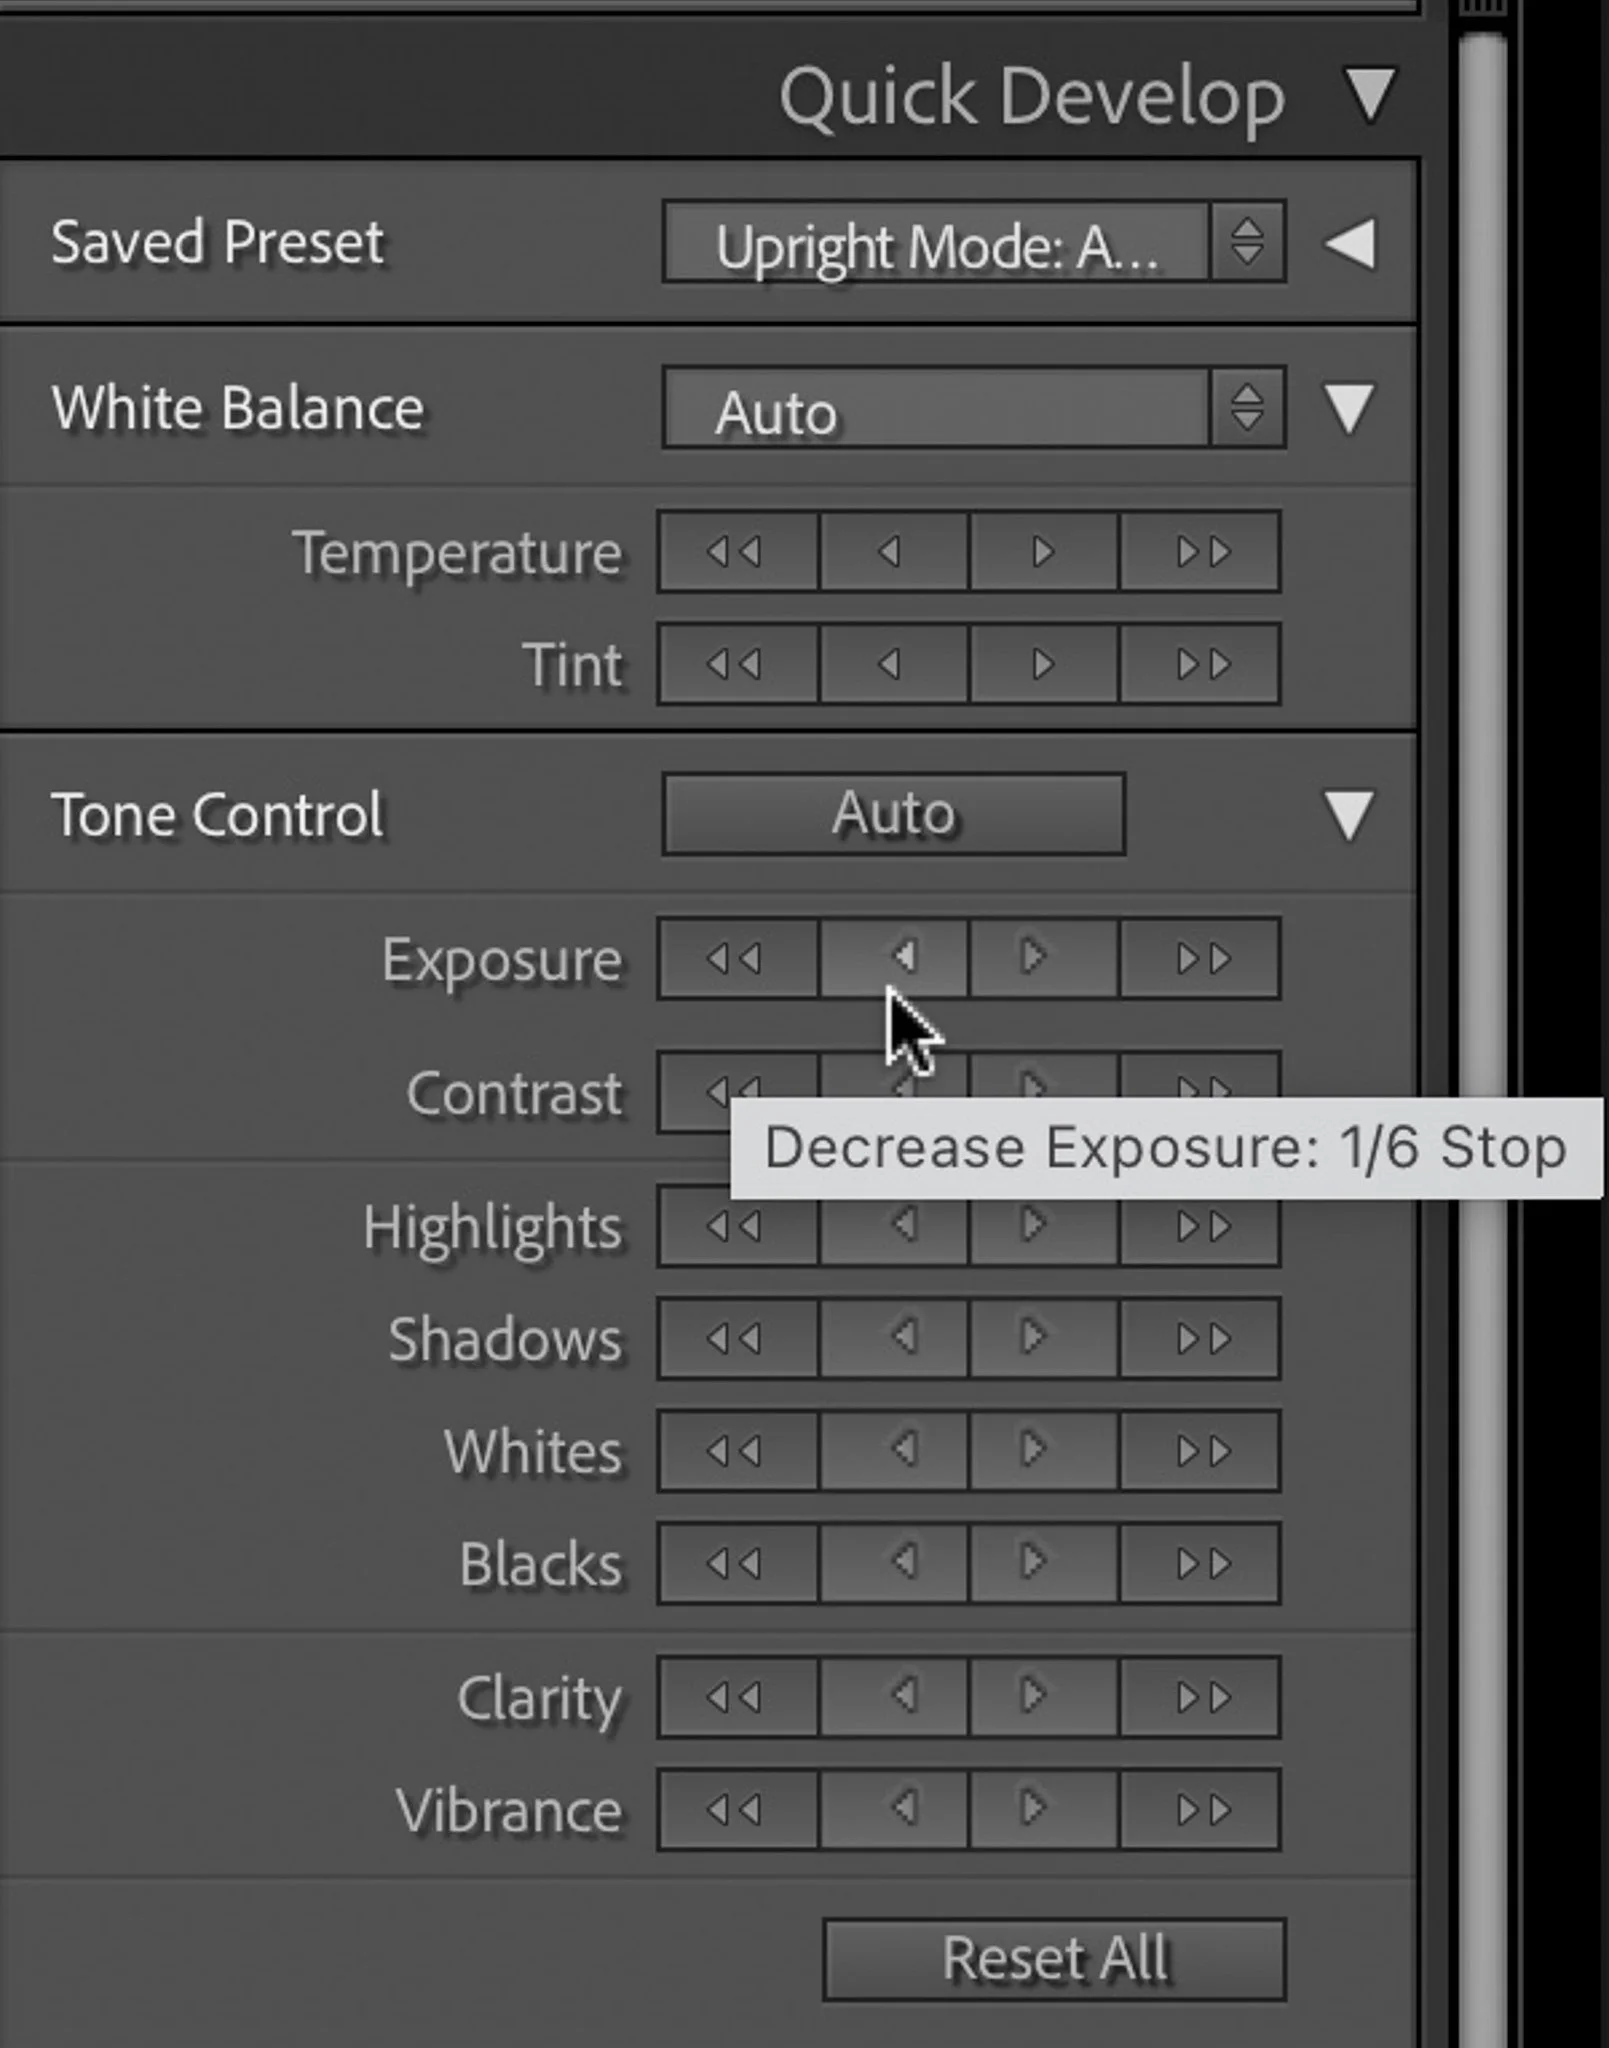
To make changes, use the arrow buttons beside each parameter:
The double arrows («« and »») make larger adjustments:
For Exposure: ±1 EV
For other values: ±20
The single arrows (< and >) make smaller adjustments:
For Exposure: ±0.33 EV
For other values: ±5
These incremental steps allow you to make controlled, relative changes to your photos.
Making Even Smaller Adjustments
Sometimes, even the default increments might feel too large for your needs. Fortunately, Lightroom has built-in shortcuts to refine these adjustments further:
Quick Tip 1: Fine-Tune Adjustments with the Shift Key
When you hold down the Shift key, the adjustment increments become even smaller:
For Exposure: Changes drop from 1/3 EV to 1/6 EV.
For other parameters: Steps reduce from ±20 to ±5.
This enables even more precise control over relative edits, perfect for fine-tuning your images.
Quick Tip 2: Swap Clarity and Vibrance with Sharpening and Saturation
If you hold down the Alt/Option key, the Clarity and Vibrance sliders in the Quick Develop panel are replaced with Sharpening and Saturation controls. This hidden feature can be incredibly useful for making quick adjustments to these parameters without switching to the Develop Module.
Why Use Quick Develop?
The Quick Develop panel is a valuable tool when working with large sets of photos that have varying starting points. Instead of making identical changes to all selected images, you can fine-tune each one relatively, ensuring consistent yet individualized results. This feature is especially useful for photographers who work with events, weddings, or any scenario where the lighting and settings can vary greatly between shots.
Final Thoughts
While the name “Quick Develop” might suggest a tool for rapid edits, its true power lies in its ability to make relative adjustments efficiently. By mastering this panel and its shortcuts, you can significantly enhance your Lightroom workflow, saving time while maintaining precision and control.
Give it a try the next time you’re editing a diverse set of images, and experience how relative adjustments can simplify your process and elevate your results!


